
Luminizer. Highlighter. Face glowifier. Skin sparkle stick. Magic wand. Whatever you want to call them, highlighting products are here to stay…
If you’ve already discovered the wonder that is a highlighted face, kudos to you for getting on the train early. If not, you’re missing out and I’m here to tell you why. Either way, keep reading to learn the right way to apply the stuff for maximum (yet subtle) impact.
First, a no-no: Since the point of a highlighter is literally to highlight or brighten a specific part of your face so it looks like light is just naturally hitting it, picking a product that contains chunks of glitter or a frosty pigment isn’t the way to go. We’re well out of the 90s — thank god — and anything glittery or frosted will create a look that’s positively robotic, too fairy-like with chunks of glitter dotting your skin, or makes you look way oilier than you are.
Now onto application:
Step #1: Formula
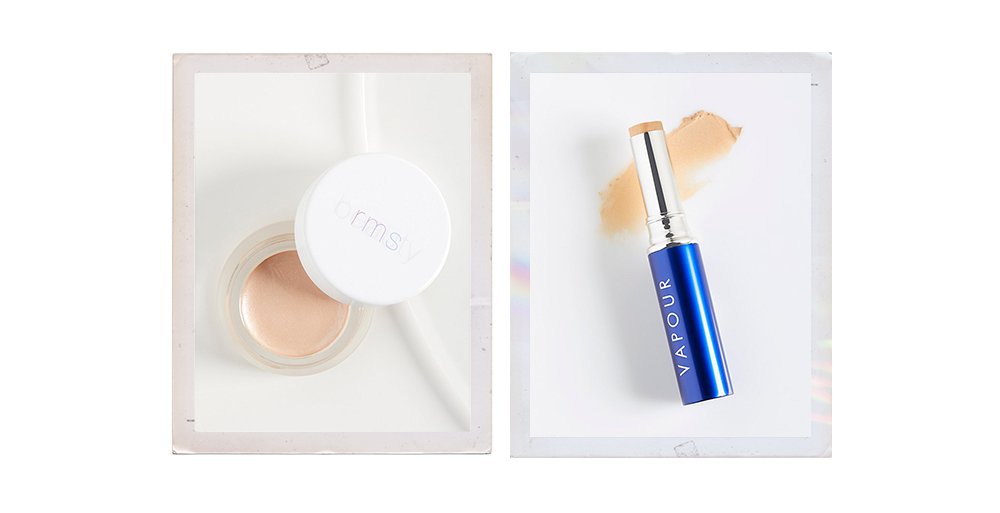
You want to find a formula that’s subtle and buildable. Luckily, RMS’ Magic Luminizer checks off both boxes. It’s a cream, which means it melts into skin rather than sitting on top of it, plays well with other skincare and cosmetics, and is as easy to apply with your finger pad as it is with a brush.
Highlighter sticks like the one from Vapour Organics offer a similar formula to cream pots and are equally buildable and blendable, so if you’re more comfortable with something you can hold onto and apply, then go with a stick. Either option is solid and won’t have you worrying about which color to choose since they all look good on pretty much any skin tone; you just have to determine how warm or cool you want the accent to be.
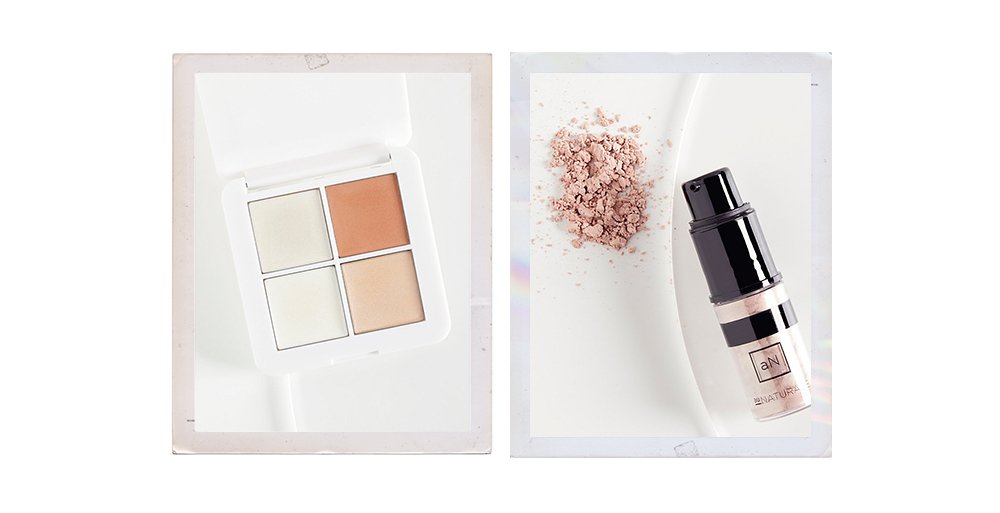
Not quite ready to dive face-first into the world of highlighters? Never fear! Au Naturale’s Pure Powder Highlighter is ideal for someone who wants to wade into the baby pool since it’s basically foolproof, softer, and delivers more of a sheer, shimmery finish.
Step #2: Prime
Once you’ve picked your formula, make sure your skin is primed and ready to receive it, which all comes down to moisturizing. If you have particularly dry skin, you may want to think about adding a face oil to your daytime routine to quench your face’s thirst and allow for easier makeup blending. If not, your regular moisturizer should work just fine.
Step #3: Apply
Now for the fun part. If you’re new to highlighter, go slow — it’s a lot easier to add more product to build the effect than try to wipe it off after applying too much. Pick up a little at a time with your finger or a brush and dab it onto skin in the desired spot. (Using your finger will warm the highlighter with body heat and help it to better sink into skin, while a brush will pick up more product.) Either way, you want to really blend it in so it looks like the glow is built in, like you’re radiating from within, instead of sitting on top of it.
And you want to make sure you’re applying product to the parts of your face sun that would naturally be hit, and light would naturally reflect off, i.e. the “high points” of your face: cheekbones, brow bones, nose, etc. Here’s what to target with that face glowifier:
-
- Brow Bone: Apply along your brow bone, just under your eyebrow (but above your eyelid) to make eyes look wider and more awake.
- Eyelid: Another trick to making eyes look bigger and more awake? A dab of highlighter right in the middle of your eyelid.
- Inner Corner of Eye: Zero sleep? Fake it with a touch of shimmer at the inner corner of each eye. It’s an area that’s usually dark and full of shadows (basically the haunted house of your face), so a bit of highlighter helps attract light and brighten it up.
- Nose: The bridge of your nose is typically the highest point on the plane of your face, which means it catches the most light. If you want to fake a slimmer nose, draw a thin line of product down the bridge and then blend. The light the product catches will create the illusion of a slimmer feature.
- Cupid’s Bow: That cute little depression between your nose and upper lip? That’s call a Cupid’s Bow and using a tiny bit luminizer in the V creates the illusion of fuller lips. Pucker up!
- Cheekbone: To define your cheekbones (or fake ‘em), apply highlighter along the cheekbone in a diagonal line. Start from just beneath the center of your eye and blend up toward the outer edge of your eye and hairline.
+Want more on inner and outer beauty? Check out more from Allie White here!
Thank you for this! I rarely use highlighter and I don’t really like watching makeup tutorials that much, so it’s nice to see the information in written form for once!
Charmaine Ng | Architecture & Lifestyle Blog
http://charmainenyw.com
Just a friendly suggestion, don’t want to sound too bah-humbug – maybe would do better to proof read a little more before publishing? There were some spelling/grammar mistakes that bugged me and stopped the flow of reading for me. Otherwise, great article!
thank you for your feedback, maxine. our goal is, of course, to ensure that we have nothing in the way of typos/errors in our copy… i did find two after seeing your comment, and apologize for not catching them the first time around. we’ll work harder to prevent mistakes from marring your experience in the future.
I also just discovered adding a little bit on top of my concealer to add a pop and look more awake! WOW the difference is huge and I recommend it to anyone that suffers from serious eye baggage.