
When it comes to makeup, bronzer can be your best friend or your worst enemy. Used correctly, it can add a lovely, natural-looking glow to your already gorgeous face and fake a sun-kissed look without the risk of sunburn. Used incorrectly? Have you ever seen an episode of “Jersey Shore”? (A show for the ages, yes, but not when it comes to properly applying makeup.)
To prevent the possibility of making yourself look like a Cheeto, make sure you’re choosing the right shade and formula of bronzer, and that you’re applying it correctly. Here’s how to end up more sun-kissed than just-rolled-around-in-a-big-vat-of-cheese-dust.
Test a little on your wrist to make sure it “warms” your skin tone without making it look fake. If you have fair skin, look for a honey-colored bronzer. For a medium complexion, choose a rose-bronze or gold flecked bronzer. Dark skin is best enhanced with a tawny or amber bronzer.
Choose the right shade.
The whole point of bronzer is to add subtle warmth to your complexion — not color. You want to find a shade that’s only one to two shades deeper than your natural skin tone to avoid it looking obvious and fake.
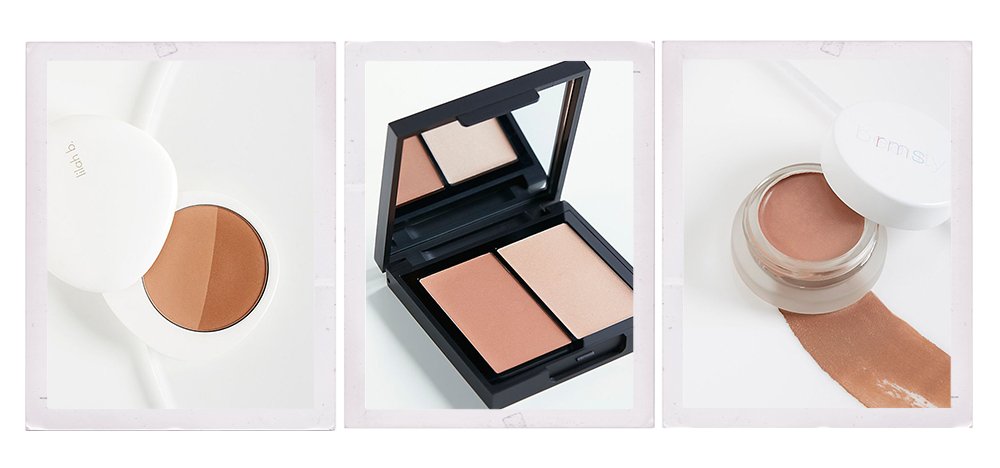
Many lines have light, medium and dark options, simplifying the shade-finding mission a bit. If you’re very fair, go for light and apply with a soft hand. If you’d consider yourself medium-toned…you get it. No harm will come from a shade that’s too light for your skin — just layer it a bit. If you’re not sure, opt for a product that has multiple shades in one, like the Bronzed BeautyBronzer from Lilah B.
Another thing to consider when it comes to shade is the bronzer’s undertone. The standard three are pink, peach and yellow, so you’ll want to pick the one that matches your skin’s undertone to ensure it blends and doesn’t look too one-dimensional. Fair? Go for a peach or pink shade. Medium or olive-toned? Copper and honey are your best bet. Dark? Look for a rich brown or amber with a touch of shimmer to highlight your face.
Pro tip #1: Test shades on the inside of your wrist to make sure warms your skin without looking fake.
Pro tip #2: If you’re on the bronzer train year-round, invest in at least two different shades. The one you wear during the summer to highlight your already sun-kissed skin will (and should) be different than what you wear in the dead of winter to perk up your face a bit.
Pick the right formula.
After you’ve figured out what shade will look best and most natural on your skin, consider formula. Most of you are probably used to powder bronzer and that’s totally fine. They’re the easiest to apply and blend, and are great if you have oily skin as they don’t add extra moisture. If you’re new to bronzer, consider starting out with powder to a get a feel for the stuff.
Cream and gel-based bronzers are another option, particularly if your skin is a bit drier. They’re incredibly easy to blend and build since you’re applying with your fingers. The creamy consistency means there’s a sheen to these formulas, so be prepared for seriously glowy, dewy skin. What’s more, since they’re sheer, you can really see your skin’s natural texture underneath, something you have to be careful about with powder if you apply with too heavy a hand.
Arm yourself with the right tools.
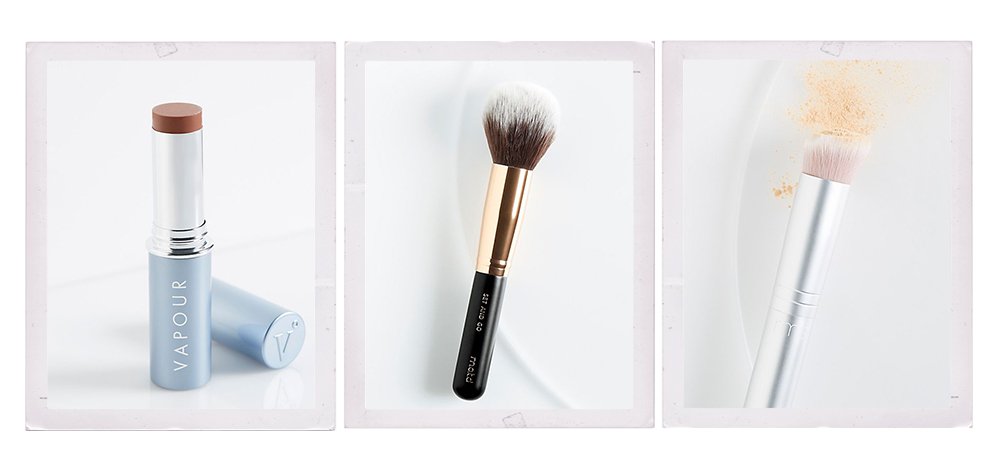
Going the powder route? Grab the largest, softest brush you have. If your brush is too dense, the powder will be too concentrated and obvious. A fluffy brush ensures you’re not depositing too much color in any one spot on your face.
More of a cream or gel gal? Go ahead and use your fingers to warm the product and then apply before blending well with a damp makeup sponge or foundation brush.
Apply!
You’ve made it this far — don’t quit now! (And don’t apply bronzer to your whole face.) For the most natural-looking application, you want to make sure you’re only hitting the parts of your face the sun would naturally hit during a couple of hours walking around in the sun: cheekbones, forehead, chin, the bridge of your nose. (This isn’t contouring, people! You’re not adding depth here, just sunny warmth.)
Think about depositing color in the shape of a 3 on each side of your face: starting in the middle of your forehead, sweep the brush or place the cream/gel along your hairline, down to the temple, in toward your nose along the top of the cheekbone, back out toward the ear and down the jaw to your chin. Repeat on the other side. Hit the bridge of your nose before using anything left on the brush/sponge to add a bit of color to your neck.
For powder, you’ll want to swirl the fluffy brush in the bronzer and gently tap off the excess. When applying, hold the brush at a bit of an angle to your face so the entire brush head isn’t resting on your skin. For cream/gel, dab the bronzer on with your fingertips in that 3 pattern before blending outward with your sponge or foundation brush.
Regardless of formula, the key here is to blend. Nothing is worse than harsh lines or obvious deposits of color — nothing sun-kissed about that!
I’ve never used bronzer before (I know, I’m slow) mostly because I don’t know how, so this is great! Thanks!
Charmaine Ng | Architecture & Lifestyle Blog
http://charmainenyw.com
Thank you for this tutorial! I’m very pale and never wear bronzer but maybe I will after this ;)
Look cool. Thanks for your sharing the tutorial. I will apply these to see how it will be.
Looks great. The story is cool.
Awesome! It looks great! Thank you for the post!